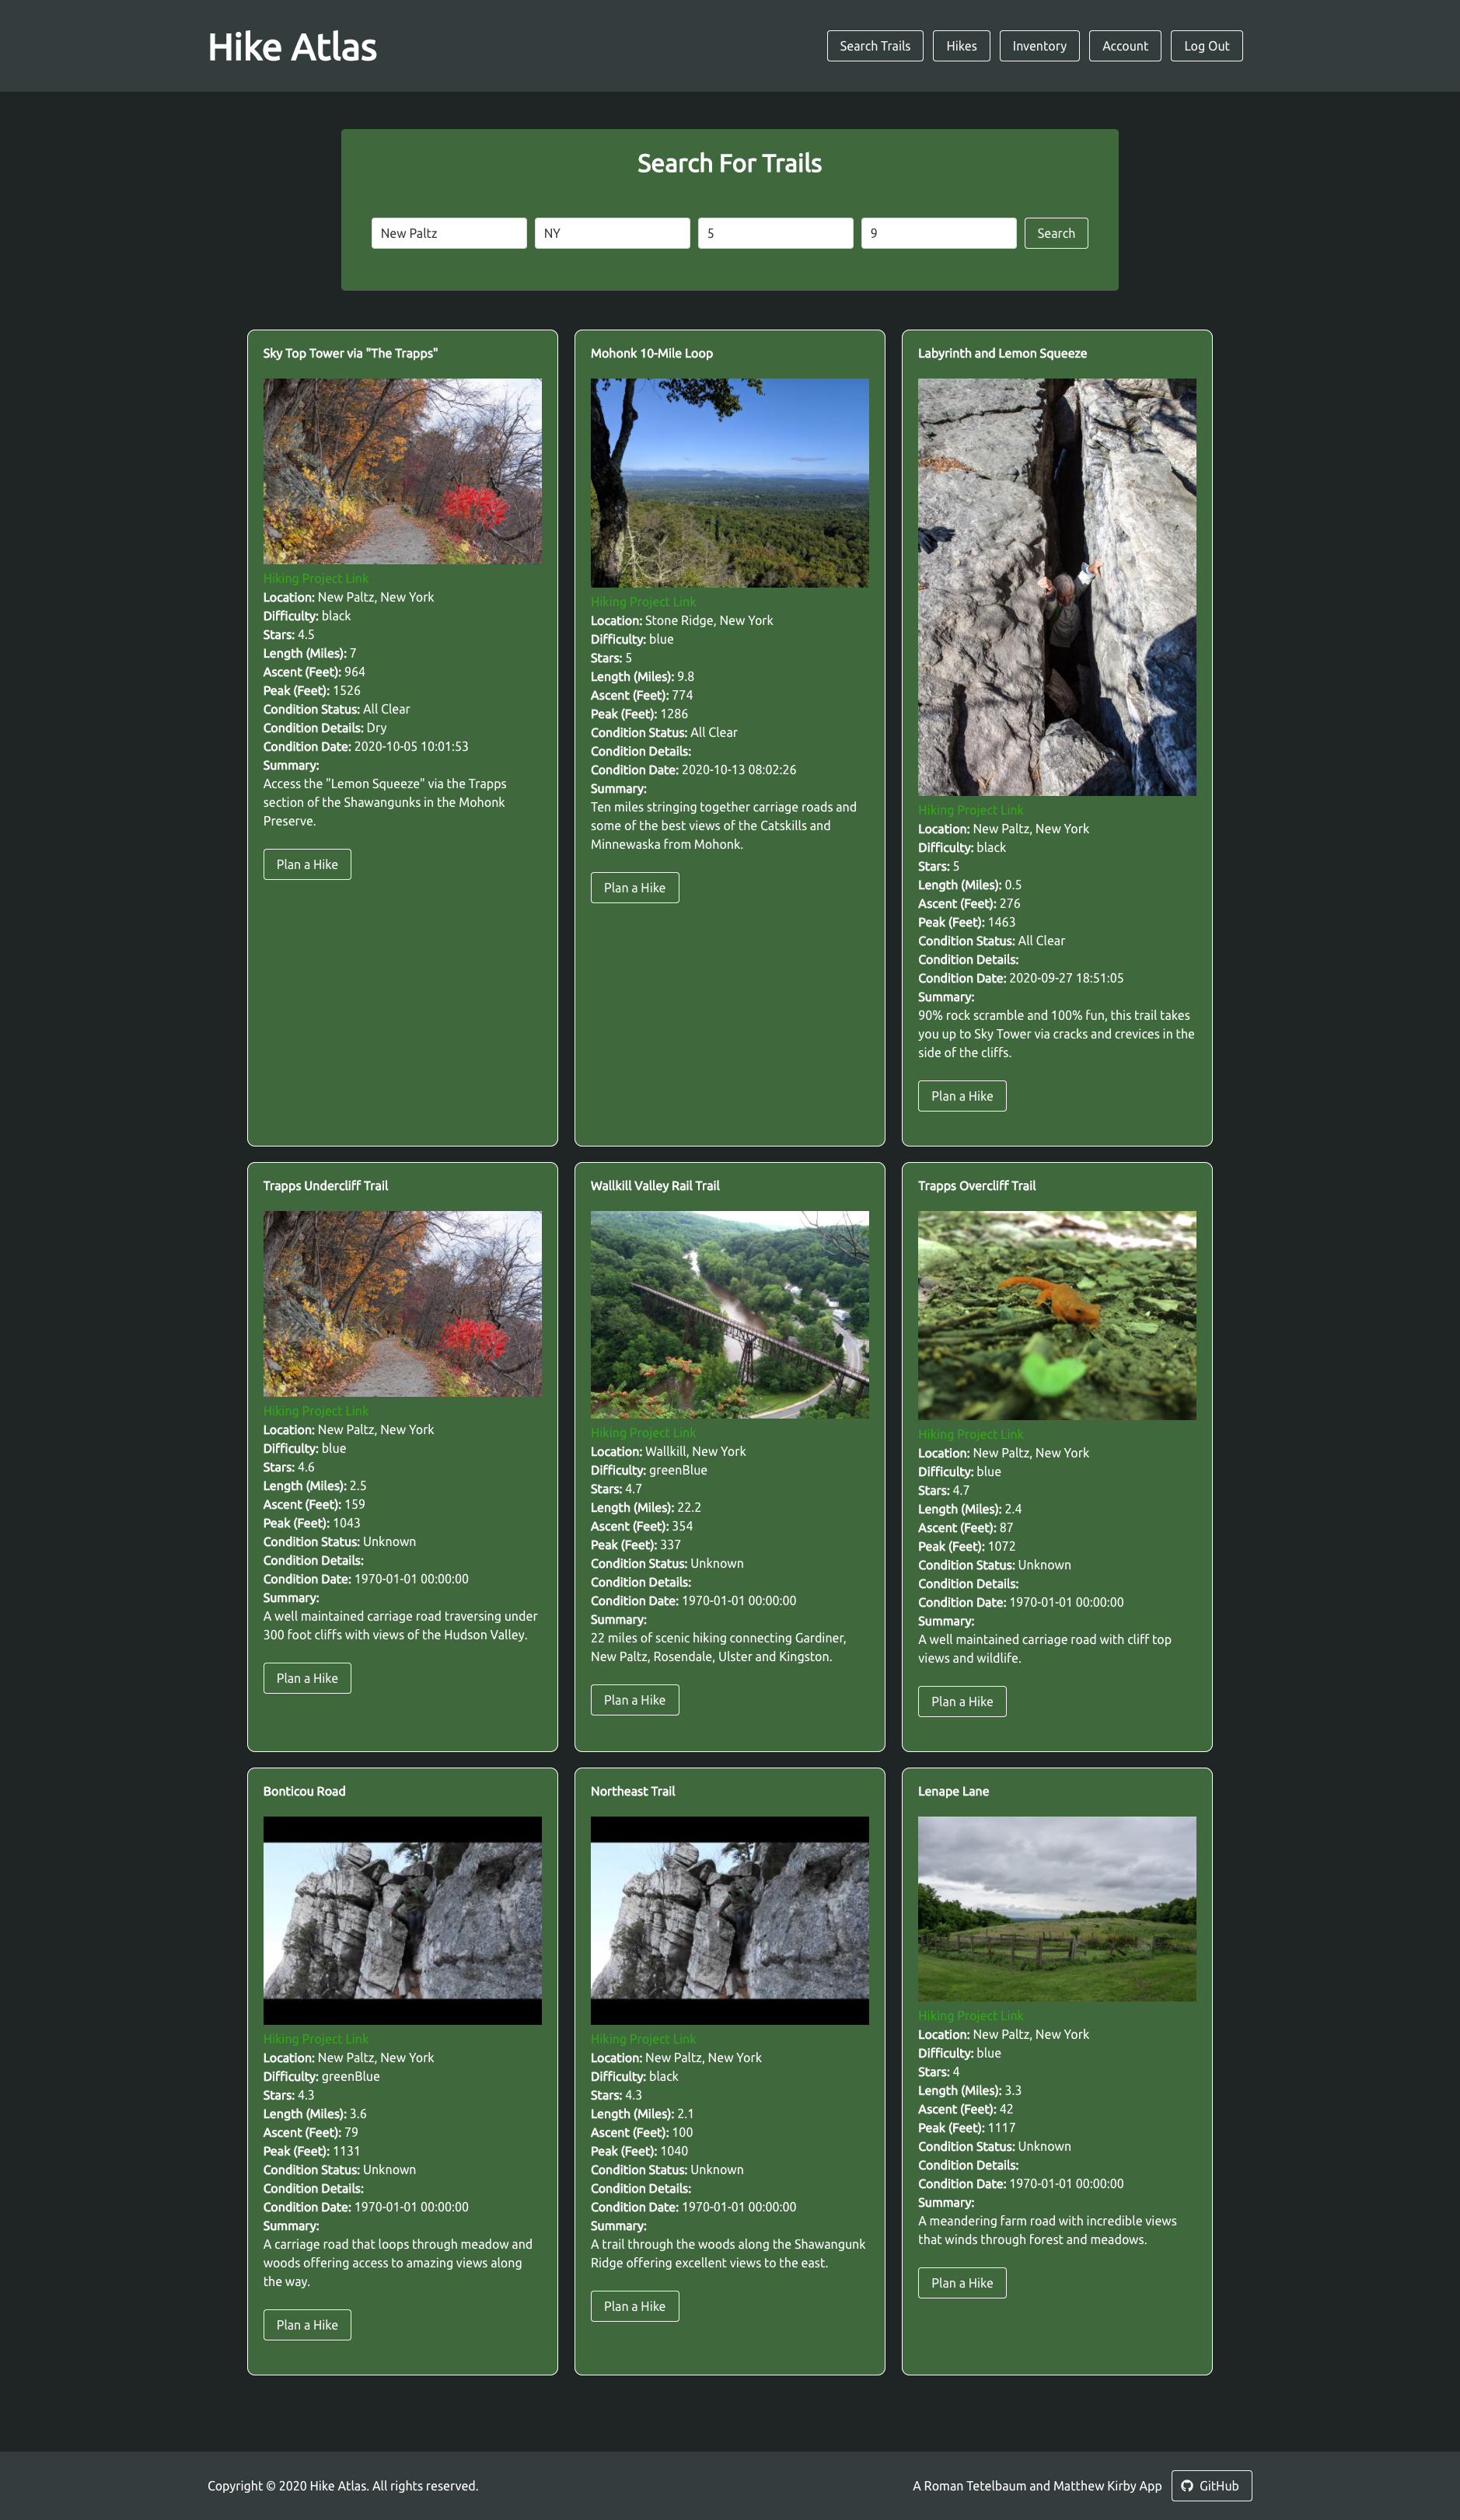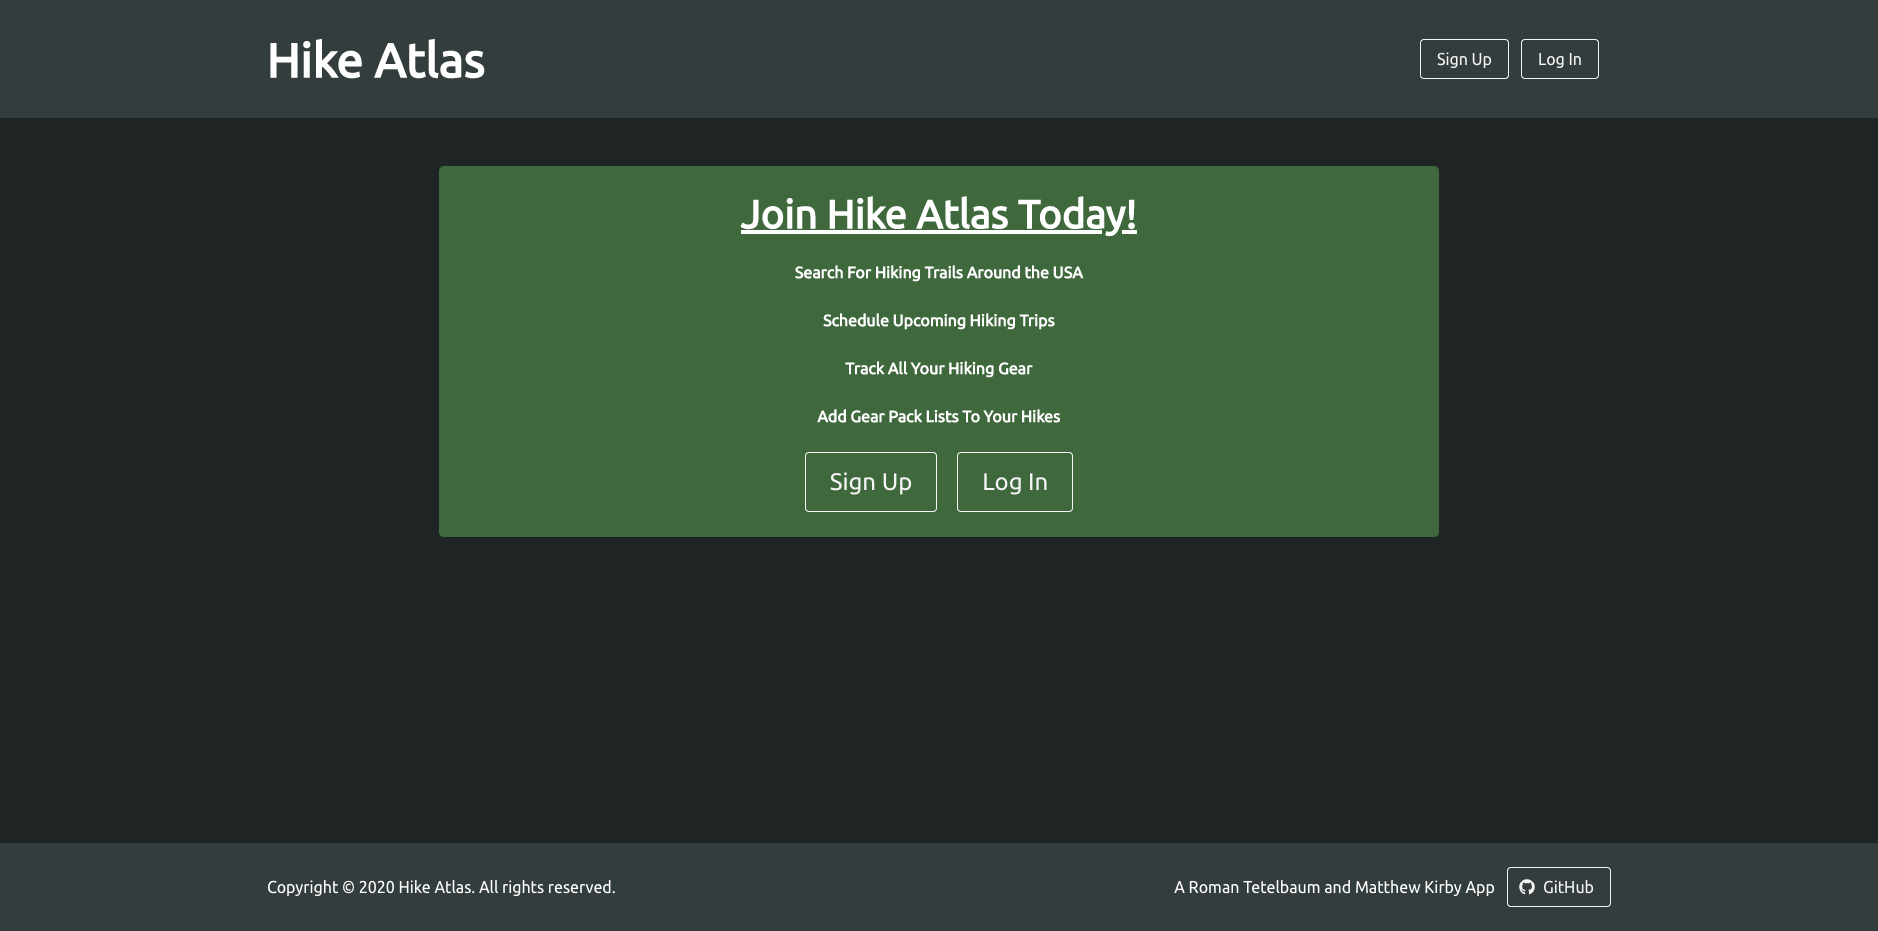
With my partner and I heading into project week during Phase 2 at Flatiron School Software Engineering Immersive we were tasked with building a Rails App with MVC structure and RESTful conventions. We initially weren’t sure what we wanted to build but we eventually landed on our shared joy of hiking. After a few hours of brainstorming different directions, we landed on a hiking trail app where user’s can find a trail they’d like to hike, create a hiking itinerary, and plan a gear pack list. Our next step was to begin planning our user stories.
User Stories:
We knew we wanted users to be able to search trails across the US and then schedule upcoming hikes. Furthermore, we wanted those upcoming hikes to be an itinerary that could be edited and updated. It was out of this itinerary idea that we starting discussing tracking hiking gear and adding those pieces of gear into a pack list on each hikes itinerary. With these goals in mind we mapped out these 12 user stories:
- As a user, I want to be able to log into the application
- As a user, I want to be able to view data about `Trails` near a selected area
- As a user, I want to be able to schedule a new `Hike`
- As a user, I want to be able to view my `Hike`s (upcoming and past)
- As a user, I want to be able to update my `Hike`s
- As a user, I want to be able to delete my `Hike`s
- As a user, I want to be able to add `Item`s to my inventory
- As a user, I want to be able to assign `Item`s a `Category`
- As a user, I want to be able to view my `Item`s by `Category`
- As a user, I want to be able to update my `Item`s
- As a user, I want to be able to delete my `Item`s
- As a user, I want to be able to add `Item`s to a `Hike`s pack list
Planning the Domain Model and Associations:
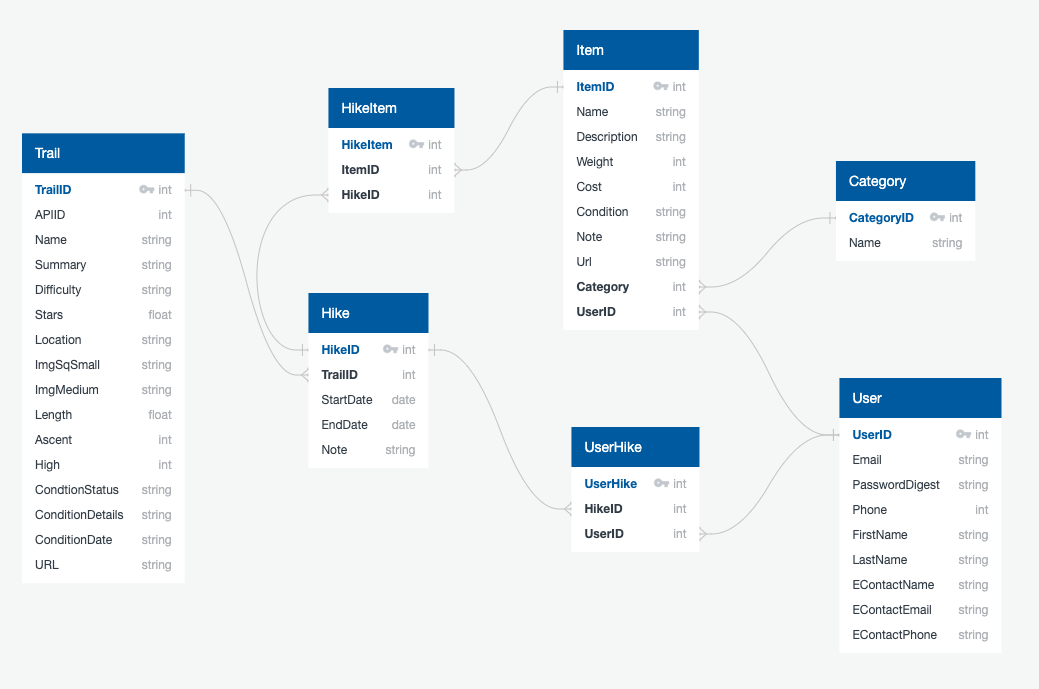
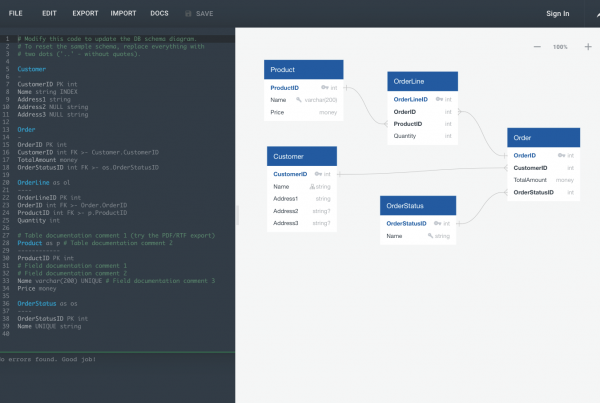
Planning the domain model was extremely simple with the site Quick Database Diagrams. It’s a really slick way to mock up schemas and has a tons of features that could fill up its own post. I highly recommend checking it out. We ended up with seven different Ruby models sketched out for our database schema. We had join tables so that a user’s items could be added to multiple hikes and individual user’s could have multiple hikes. We planned to have a trails model to store a particular trails data into our database once a user created a hike from our trails API search. This allowed us to store a particular trails data that could be associated with any hike planned by our users and reduced our calls to the trails API.
Choosing a Database:
We decided to use postgreSQL as our database to help with our eventual deployment to Heroku. It ended up being a much simpler process than expected and I recommend trying it out even if you’re a beginning programmer. I wrote an article on that process and setup: Changing your Ruby on Rails database from SQLite3 to PostgreSQL
RESTful Routes:
REST or Representational State Transfer is a set of principles that guide the software architecture of web services. Following RESTful conventions means that specific HTTP verbs ( get, post, put, delete) are mapped to associated CRUD actions (create, read, update, delete). We had many models that followed RESTful conventions and our Hikes model was one of our models that had all four CRUD actions. Here are our rails routes for our Hikes model:
HTTP Verb
Path
Controller#Action
Rails MVC:
Rails makes it incredibly easy to setup your Model-View-Controller structure because Rails follows MVC architecture by default! That’s Rails’ Convention over Configuration mindset. Matthew Main, in their Medium article, Rails Request-Response Cycle, and Se-Education.org have pretty good overviews of how Rails applications are structured.
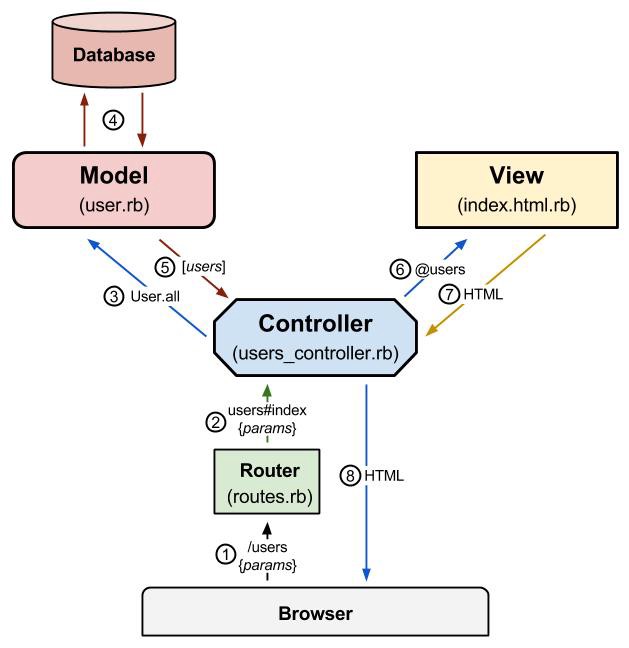
In our Hike Atlas application our routes.rb file routed any browser input (1) to the appropriate action (2) in various controllers. Those actions made requests to our models (3) for data from our database (4), which was then returned to the controller (5) to be processed in the view (6) that finally sends HTML (7) back to the controller to be displayed on the browser (8). Once we had all our routes in order and our MVC structure we spent lots of time working on our CSS and layout.
Bulma Styling:
According to Bulma’s website, “Bulma is a free, open source CSS framework based on Flexbox and used by more than 200,000 developers”. I’m only going to talk briefly about Bulma because there’s a much larger discussion to be had about the stunning things you’re able to accomplish with Bulma. If you’re looking to add styling to your Rails application take a look over their documentation.
Stretch Goals:
- Emailed Itinerary (+ emergency contact)
- Emailed Invite to a Hike
- Date + Area = Weather API
- SMS Messages
- Hike Review
- Hike Message Board/ Comments
- User Friendship
Our final project ended up being super fun to create and I really enjoyed seeing it all come together. We built a wonderful minimum viable product (MVP) with a few extra bells and whistles. We planned several stretch goals in our project pitch that we were close to implementing and hopefully we can return to the project soon to add some more of them before finally deploying to Heroku!

