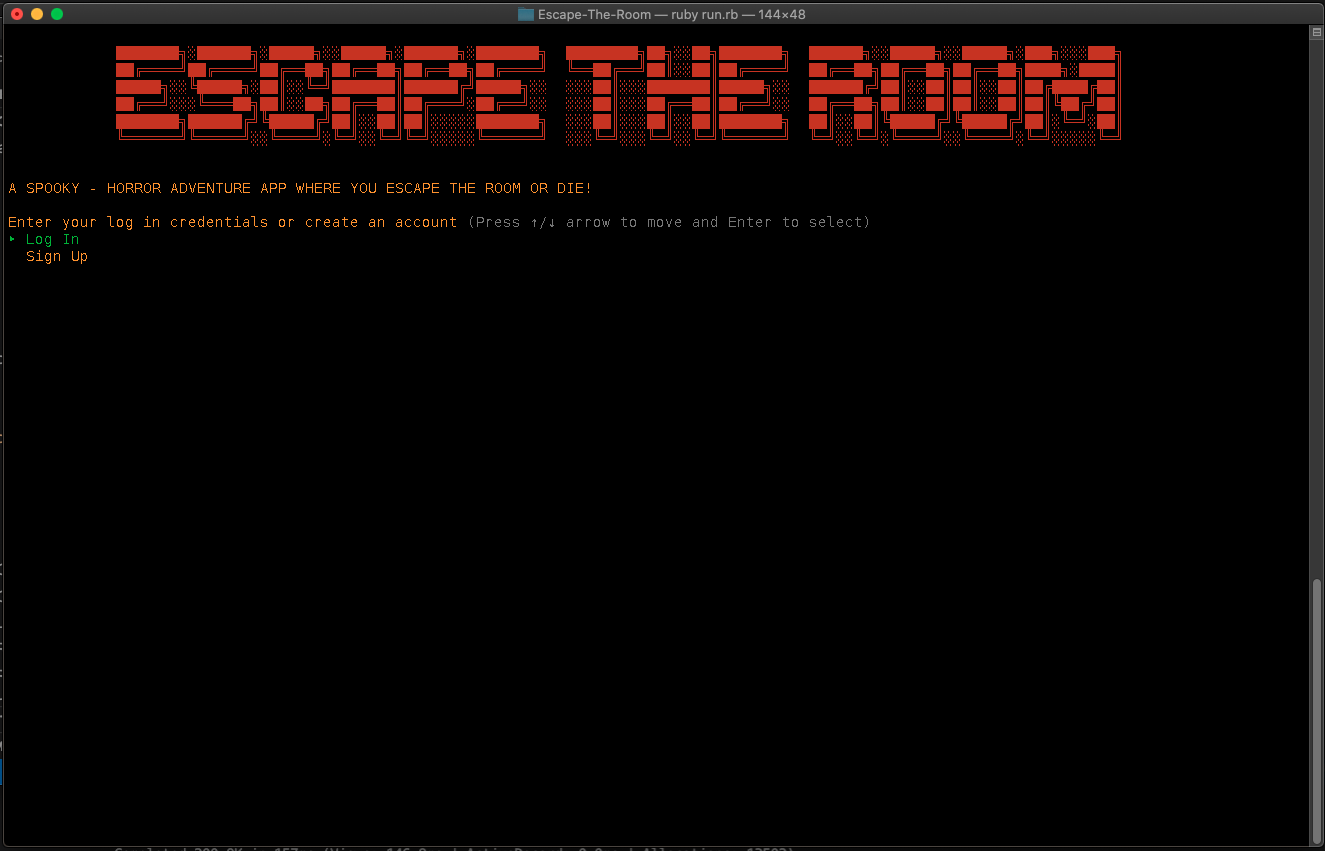
With my third week at Flatirons Schools Software Engineering Immersive coming to a close, I examine how my partner Ajak Cyer and I planned out and created our first Ruby CLI escape the room game. Between planning our domain model and building out the escape the room story, we spent countless hours outlining our project structure before we ever began to code.
It took a lot of work before we landed on a halloween based escape the room type adventure game. We first sat down and cataloged each other’s interests. Each of us took a few minutes to talk about things we were interested in, our past times, what we’ve been doing during the pandemic, and any new skills we’d learned recently – all while the other person took notes and asked questions. We then talked over our shared interests and started discussing random ideas that sounded interesting. It’s through this conversation that we got excited about building puzzles and a halloween themed story for an escape the room adventure game.
User Stories:
One of our first steps was building out user stories. Thinking about user stories is integral to understanding how you expect your users to interact with your application and how you can break your code up into different segments. Sean Padden has a helpful article on Medium entitled Start Writing User Stories for Your Program! that delves into how you can create users stories and the benefits of writing them. I’d highly suggest giving it a read over. We decided to build a CLI application that allowed our user to live out the following user stories:
- As a user, I want to be able to sign up and play through the game
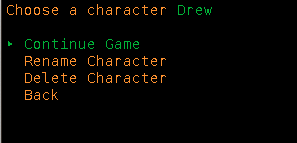
- As a user, I want to be able to continue my unfinished games
- As a user, I want to be able to view my past characters
- As a user, I want to be able to delete characters
- As a user, I want to be able to check my characters stats
- As a user, I want to be able to search for items needed to solve riddles/puzzles/locks
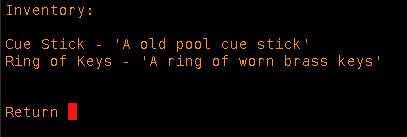
- As a user, I want to be able to check my inventory of items
- As a user, I should be able to save/ quit in the middle of a level


Planning the Domain Model:
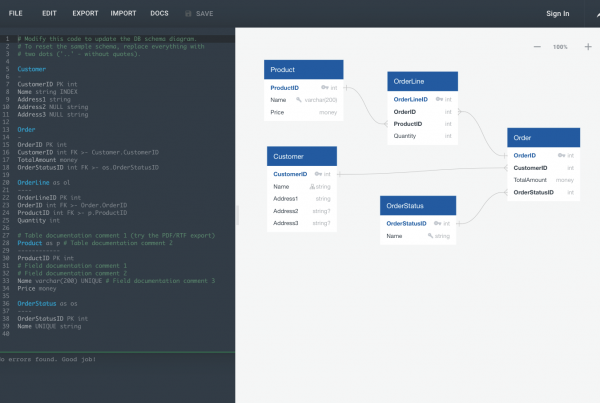
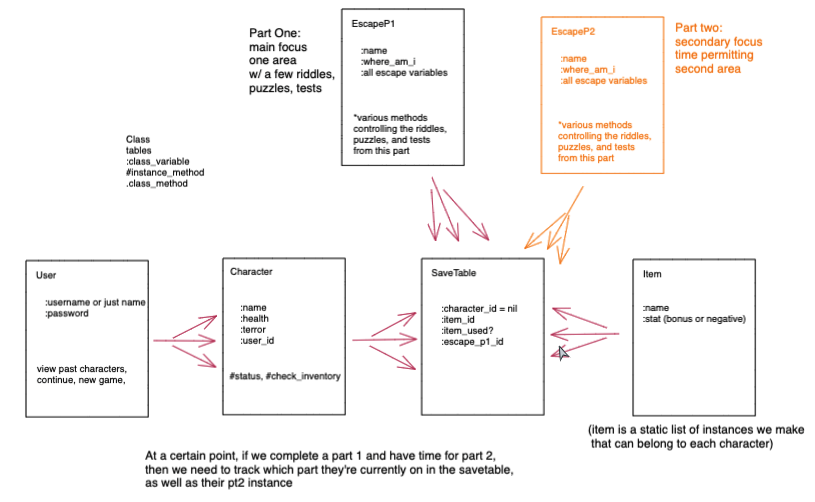
With our user stories in mind, we began to envision our domain model. We knew we wanted a User to be able to log in and create as many Characters as they wanted. In our game, a user’s Character needed to be able to collect Items so that they could solve our stories puzzles. And finally we needed each character to have a unique and continuable Escape from our game. Those classes began to form into the domain model seen below. Our final planning had a join table between Character, Item, and Escape that would act as our single source of truth between those three classes.
Associations:
With this domain model, we began plotting out our associations. We quickly changed our “save file” class from SaveTable to Record to more clearly express the intentions of that class. With the class as SaveTable and the database table as save_table talking about our save file got confusing after no more than 5 minutes in. These associations made the building out of our SQLite3 database and the setup of ActiveRecord a breeze.
- `User` has many `Character`s
- `Character` belongs to a `User`
- `Character` has many `Record`s
- `Character` has many `Item`s through `Record`s
- `Character` has many `Escape`s through `Record`s
- `Item` has many `Record`s
- `Item` has many `Character`s through `Record`s
- `Item` has many `Escape`s through `Records`
- `Record` belongs to a `Character`
- `Record` belongs to an `Item`
- `Record` belongs to an `Escape`
- `Escape` has many `Record`s
- `Escape` has many `Item`s through `Record`s
- `Escape` has many `Characters` through `Record`s
Designing the Room:
Due to the few days we had to complete this project we knew we needed to narrow our scope from a multiple room escape the room adventure to a single room with a few puzzles. To do this we first started with the overall narrative: Dr. Frankenstein has you trapped in a basement and he’s going to do grisly experiments on you soon unless you escape! We then started breaking that narrative down into smaller chunks. We decided you’re trapped in a cage in his basement. We knew we needed individual sections or areas of the basement that would serve as our item and puzzle locations so we began discussing what the basement might look like.
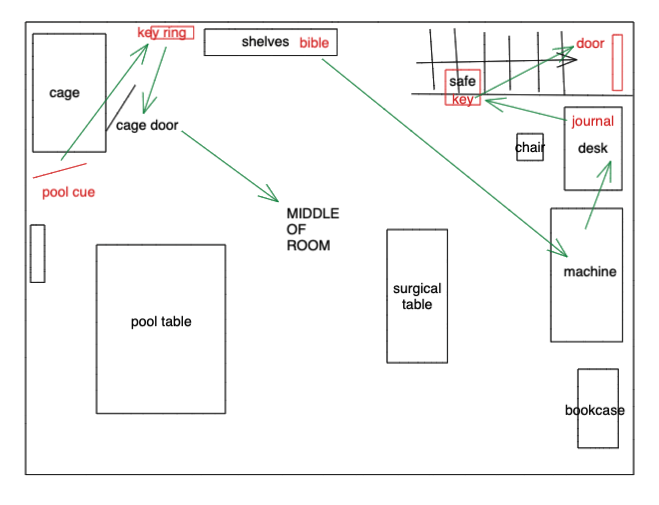
We landed on a basement containing the cage you start trapped in, long shelves, a bookcase, a desk, a spooky machine, a surgical table, a safe, stairs to the exit door, and a pool table.
Building The Story Backwards:
From these locations we started to build a narrative backwards from the escape. You need to escape through the door at the top of the stairs. That door has a key which is locked in a safe. The safe has a combination that is written down in a journal. That journal is locked in a desk drawer. That drawer won’t open unless the machine is powered on. That machine won’t power on unless you enter the correct access code. That access code can be deciphered by reading a bible passage and looking at intricate carvings in the desk’s surface. And finally, to find that bible you need to search the room. With this rough path planned out we were then able to plan for several false narratives paths where the player could explore and investigate background details but not advance the story’s escape.
- DOOR – Ultimate exit is a door that needs a key
- SAFE – key in safe
- DESK – code to safe in hidden desk drawer on journal DoB is safe code 03/11/18
- DESK – desk needs power from the electricity to unlock
- MACHINE – electricity machine needs access codes (enter wrong code get shocked)
- SHELF – access codes in a book on a shelf (Bible verse highlighted in tty – creation verse)
- ROOM – everything you can do from the middle of the room
- CAGE – cage needs keys to unlock cage
- CAGE – get pool stick to reach keys
- INTRO – Wake up in a cage…
False narrative paths: (narrative that just increases or decreases stats)
- BOOKCASE: exploring the bookcase
- SURGICAL TABLE: exploring the surgical table
- DESK: Other desk drawers
- POOL TABLE: pool ball item, exploring the pool table
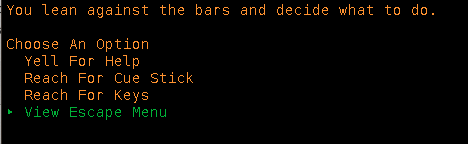
- CAGE: trying to reach keys and yelling for help
- DOOR: ring of keys don’t unlock exit door, banging on the door
With our rooms escape path mapped and our false narratives identified, we began to build their physical associations to better plan for text narrative and immersion. The desk exists somewhere in the room and we need it to be described in relation to the other objects in the room. For this we drew up a quick floor plan, that showed the spacial relationships between our fictional areas in the basement and the paths needed to obtain items and complete puzzles.
With all this planning we were able to put together a short little escape the room game in just three days of coding. We’re very happy with what we put together and wish we had one more day to add more descriptions, more areas to interact with, and especially more puzzles! We’ll hopefully revisit this in the future to add more content and fix a few edge cases like blank character names causing various parts of the game to crash :’)